Introduction
There’s nothing more frustrating than finishing a tiling project and stepping back… only to notice wobbly grout lines, uneven gaps, or grout smeared across the tiles like toothpaste. We’ve all seen it – the kind of job that screams “DIY” rather than “done with pride.”
But here’s the truth: flawless grout lines aren’t some secret only professionals know. With the right preparation, tools, and a little patience, anyone – even first-time DIYers, can achieve that neat, magazine-worthy finish.
At Beava Direct, we talk to homeowners every week who want their grout lines to look clean, straight, and consistent. The good news? It’s achievable. And it’s surprisingly satisfying.
This guide isn’t about jargon. It’s about real-world advice, common mistakes, and the simple methods that make grout lines go from “good enough” to spot-on.
Why Grout Lines Matter More Than You Think
Many first-time tilers think grout lines are just filler. But grout lines do three crucial jobs:
- They protect your tiles. Without proper joints, tiles would grind against each other and crack under pressure.
- They absorb movement. Floors and walls expand and contract – grout lines act like tiny shock absorbers (British Standards Institution).
- They define the look. Perfectly straight grout lines make cheap tiles look expensive. Crooked or sloppy lines make even designer tiles look rushed.
Think of grout lines like the seams on a tailored suit: invisible when done right, but glaringly obvious when done wrong.
The Question Everyone Asks: How Wide Should Grout Lines Be?
This is the first puzzle DIYers face. Leave too narrow a gap and tiles may chip. Leave too wide and the wall looks clumsy.
According to the Tile Council of North America, grout joint width impacts durability and style: rectified tiles can sit closer together, while handmade or rustic tiles often need wider joints (TCNA Handbook).
On UK DIY forums, tilers often suggest:
- Walls: 2–3 mm
- Floors: 3–5 mm
DIY tip: Dry-lay a row of tiles first using spacers to test widths. Sometimes what looks good on paper feels too wide (or too tight) in reality.
Tools That Make the Difference
Imagine baking a cake with no whisk or tin. Possible, yes. Pretty? Not so much. Tiling is the same: tools matter.
Here are the essentials:
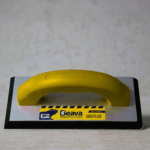
- Grout Float: A must-have. A rubber-edged float pushes grout into joints smoothly and scrapes away excess. Rounded-edge floats are kinder to tiles.
- Sponges (quality ones): Not the green scrubber from under your sink. Proper tiling sponges, like the ones we stock at Beava Direct, are soft, absorbent, and won’t scratch.
- Finishing Tool: Gives grout lines that neat concave curve. Some DIYers improvise with a rounded stick or even a spoon handle.
- Microfibre Cloths: Perfect for the final buff – no streaks, no haze.
- Mixing Bucket & Paddle: For lump-free, mayonnaise-like grout. (Yes, mayonnaise is the texture to aim for!).
Step-by-Step: A Real DIY Grout Lines Walkthrough
Let’s imagine it’s Saturday morning. You’ve got your tiles up, kettle boiled, and grout bag ready. Here’s how your day might play out:
- Prep Like a Pro
You tape edges, clean dust, and check joints are even. You line up your spacers and quietly congratulate yourself for remembering to buy them in the first place. - Mix & Slake
You pour the grout powder into water, mix until smooth, and, here’s the bit many skip – you let it rest (“slake”) for 10 minutes. Why? It allows chemicals to activate, giving grout strength and flexibility. - Application
Float in hand, you spread grout at 45°, pressing firmly. The first joint fills perfectly. You grin. Then it goes everywhere on tile two. Panic! But you quickly learn: scrape excess off as you go. - Shape Those Lines
About 15 minutes in, the grout firms up. You run your finishing tool down the joint, and suddenly it looks professional. Confidence grows. - The Sponge Stage
This is where DIYers often slip. Too wet a sponge? Disaster. You drag grout out of the joints. You learn to wring the sponge almost dry and wipe diagonally. Magic. - Buff to Shine
Later, you return with a dry cloth. The haze disappears. The lines? Straight, clean, flawless. You stand back, proud.
That’s how a Saturday turns into bragging rights at Sunday dinner.
Common DIY Mistakes with Grout Lines (and How to Avoid Them)
Even the keenest DIYers stumble here:
- Skipping spacers: Leads to wonky lines. Always use them, then remove before grout sets.
- Mixing grout too runny: It won’t stay in the joints. Aim for yoghurt or mayonnaise thickness.
- Wiping too soon: Patience is key. Wait until the grout is firm before the first sponge wipe.
- Using kitchen sponges: They’re too rough and too small. Invest in proper ones.
- Not sealing (if needed): Some grouts need sealing to resist stains. Skipping this step leads to regret, especially in kitchens.
Real DIYer Voices
- Sophie, Leeds: “I rushed and ended up with pinholes everywhere. The second time, I slowed down, perfect.”
- Martin, York: “I thought I could eyeball the gaps. Nope. Crooked lines haunted me until I redid the whole wall.”
- Hannah, Sheffield: “I nearly cried wiping too soon. My advice? Have a cuppa while it firms up. Best tea I ever drank.”
Why Tools and Patience Pay Off
Professionals don’t have a magic touch – they just use the right gear and take their time. That’s the biggest secret: patience.
Grout doesn’t care if you’re in a rush. In fact, rushing ruins it. Take breaks, check your work, and treat each joint as a mini project. The result? Straight, smooth lines that make your tiles look ten times better.
Seal the Deal
Not every grout needs sealing, but for porous tiles or high-traffic floors, it’s smart. A clear sealer protects against water, mould, and stains. Apply once the grout is fully cured. It’s the invisible shield that keeps grout lines crisp for years.
Quick Recap Checklist
- Choose the right grout line width (2-3 mm walls, 3-5 mm floors).
- Use the proper tools: float, sponge, finishing tool.
- Mix grout correctly and let it slake.
- Apply at 45°, scrape excess, shape, then sponge.
- Don’t rush the wipe.
- Buff haze with a cloth.
- Seal if necessary.
For everything from floats to sponges, check our full range of Grout Tools & Accessories.
Conclusion
Perfect grout lines aren’t out of reach. They’re the reward of patience, practice, and using the right kit. The difference between “DIY disaster” and “pro finish” is just a few smart steps – and the satisfaction of standing back to admire your work is worth every second.
So whether you’re redoing a bathroom floor or sprucing up a kitchen splashback, remember: grout lines matter. And with Beava Direct by your side, you’ve got everything you need to nail them.
Ready to upgrade your toolkit? Explore our Grout Tools & Accessories today.